
Homemade Christmas Card Ideas: DIY Projects to Warm Hearts This Season
From Messy Crafts to Keepsakes: 25+ Creative Ways to Personalize Your Holiday Greeting Cards This Year
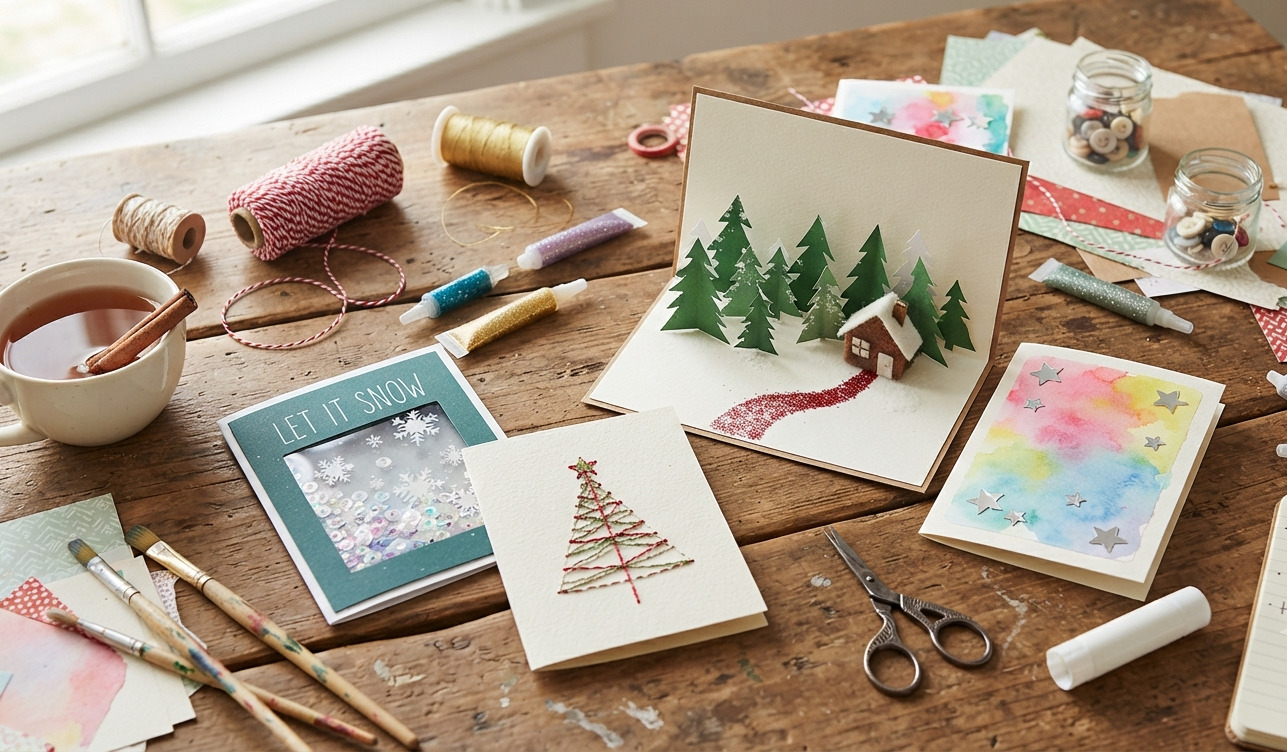
Receiving a Christmas card in the mail is a special experience. In a time when we often rely on digital messages, a physical card feels meaningful and shows you care. While store-bought cards are easy to find, making your own Christmas cards lets you add your personal touch and genuine feelings to each one you send.
Whether you are an experienced crafter or want to have some fun with your kids, these DIY card ideas are perfect for any skill level.
A Holiday Tradition Reimagined: The “Messy” Magic of Connection
Last year, I sat at my kitchen table with my niece. We were surrounded by construction paper, glitter glue, and paint-stained fingers. We were trying to make “Handprint Holly Cards.” My niece, who was five at the time, thought her hand looked more like a giant green monster than a sprig of holly. We laughed until our sides hurt, cleaned green paint off the table, and accidentally created a glitter mess that I’m still finding in the carpet.
When we finally sent those slightly crooked, glitter-covered cards to her grandparents, they didn’t talk about how “perfect” they were. Instead, they focused on the happiness behind them. That’s the joy of DIY cards; they aren’t just paper and glue. They capture our memories and a piece of our time and love sent across the miles.
Inspiration for Every Crafter
The best part of making your own holiday cards is that you can use whatever materials you have on hand. Here are some creative and trendy ideas to try this season:
For the Kids (Easy & Fun)
-
Fingerprint Lights: Transform simple fingerprint dots into a vibrant string of holiday lights using paint or stamp pads.
-
Footprint Snowman: A classic keepsake! Stamp a painted foot onto cardstock and use markers to turn it into a smiling snowman.
-
Cupcake Liner Snowman: Repurpose leftover baking supplies to create adorable, textured 3D snowmen.
-
Sponge Printed Trees: Use a simple kitchen sponge and green paint to let kids “stamp” their own unique forests.
-
Button Snowman: Dig into that spare button jar! Glue various sizes of white buttons in a stack to create a snowman, then use a fine-tip marker to draw on a carrot nose and twig arms.
-
Cookie Cutter Stamping: Use holiday-themed cookie cutters (stars, trees, or gingerbread men) as stamps. Dip the edges into acrylic paint and press them onto the cardstock for perfect, crisp shapes every time.
-
“Merry Grinchmas” Handprint: Paint a child’s palm green and their fingers red to create a Grinch shape. Add cotton balls for the hat trim and a hand-drawn grouchy face for a card that always gets a laugh.
-
Paint Chip Trees: Visit your local hardware store for free paint sample strips in shades of green. Cut them into triangles and stack them on the card to create a modern, colorful “ombre” Christmas tree.
For the Artistic Soul
-
Watercolor Wreaths: Watercolor is the perfect way to unwind. Create soft, ethereal wreaths that look elegant and professional.
-
String Art Cards: Use embroidery floss and a template to create intricate, geometric shapes that pop off the page.
-
Embroidered Trees: If you enjoy needlework, stitching a tree pattern directly onto cardstock adds a beautiful, tactile texture.
-
Paper Quilling Trees: Using thin, colorful strips of quilling paper, roll them into tight coils and pinch them into shapes to form a stunning, intricate Christmas tree design. This creates beautiful 3D texture.
-
Watercolor Masking Fluid Design: Draw your greeting or a snowflake pattern using a white wax crayon or masking fluid. Paint over the area with vibrant watercolors—the wax will “resist” the paint, leaving your design perfectly white against a colorful background.
-
Stitched Fabric Scraps: If you have leftover fabric from other projects, cut them into simple shapes like mittens or stockings. Stitch them onto your cardstock with embroidery floss for a cozy, “quilted” look that feels vintage and warm.
-
Eraser-Stamped Patterns: Don’t have stamps? Use the flat eraser end of a standard pencil as a custom stamp. Dip it in ink to create polka-dot snow, ornament patterns, or a wreath of “berries.”
Interactive & “Wow” Factor
-
Shaker Cards: By creating a small window filled with sequins or glitter, you can make a “snow globe” card that your recipients will love to shake.
-
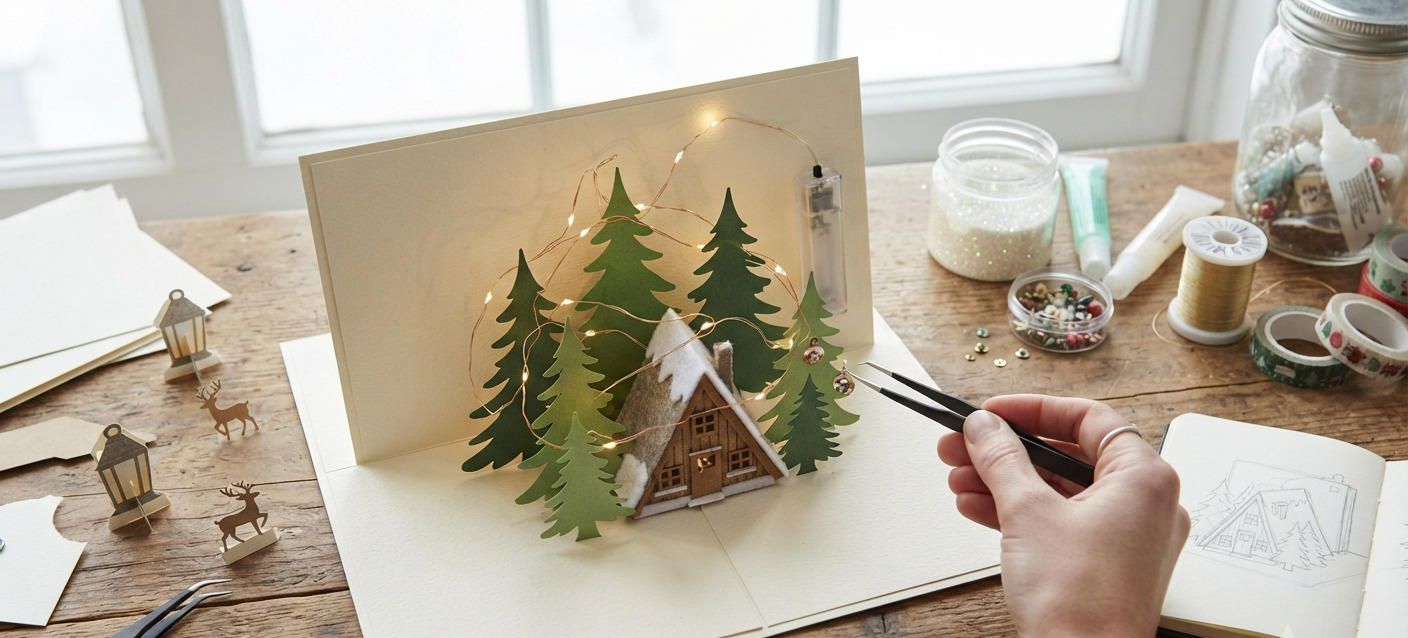
Pop-Up Poinsettia: Utilize paper-crafting templates to build 3D floral elements that spring to life when the card is opened.
-
Pull-Tab Trees: Add a mechanical element where pulling a tab transforms a plain tree into a festive, snow-covered version.
-
Christmas Tree Shadow Box: Create a card with a sliding mechanism. When the recipient pulls a tab, a piece of yellow cardstock slides behind the “tree,” making it look like the lights have suddenly flickered on.
-
Tech-Savvy QR Code Card: Create a custom QR code that links to a private YouTube video or a Google Photos album of your family’s best moments from the year. It’s a modern way to turn a paper card into a digital experience.
-
Confetti Snowglobe Card: Create a clear window on the front of your card using a piece of acetate (or a recycled clear plastic packaging sheet). Seal it with double-sided foam tape and fill it with sequins or gold glitter so it functions like a real, shaking snow globe.
-
Magic Santa Illusion: Build a “magic frame” where the image of Santa or a festive scene appears in black and white when hidden inside the sleeve, but transforms into full, vibrant color as it is pulled out of the card.
Unique Christmas Card Ideas
1. The “Stitched Magic” Watercolor Shaker
Merging: Watercolor Wash (Artistic) + Shaker Window (Interactive) + Simple Stitching (Artistic/Kids)
-
The Concept: Instead of a plain shaker window, the background inside the shaker is a soft, blended watercolor wash (perhaps deep blues and purples for a night sky).
-
How to Make It:
-
Paint a loose watercolor wash on watercolor paper. Let it dry.
-
Cut a circular or star-shaped window out of the card front.
-
Outline the outside of the window on the card front using a simple running stitch with metallic embroidery floss (adding a rustic, handmade texture).
-
Assemble the shaker behind the window using foam tape and sequins, layering it over the dried watercolor painting.
-
2. The Quilled Wreath with Photo Center
Merging: Paper quilling is a form of artistic expression. A sentimental photo adds a personal touch and makes it interactive.
-
The Concept: An intricate, 3D paper-quilled wreath frames a small, wallet-sized photo of your family in the center of the card.
-
How to Make It:
-
Cut a circular opening in the center of your cardstock.
-
Tape your family photo behind the opening so it faces forward.
-
Using thin strips of green quilling paper (or construction paper cut very thin), roll coils and pinch them into “leaf” shapes.
-
Glue these quilled shapes densely around the circular photo opening to form a lush, textured wreath. Top with a tiny red quilled bow.
-
3. The Kid-Made ” Resist” Ornament Garland
Merging: Cookie Cutter Stamping (Kids) + Watercolor Resist (Artistic)
-
The Concept: A sophisticated watercolor card where the ornaments are perfectly shaped using kids’ cookie cutters and a secret resist method.
-
How to Make It:
-
Have the kids dip metal holiday cookie cutters (small trees, stars, bulbs) into white masking fluid or press them onto a white wax crayon heavily.
-
Stamp the shapes onto watercolor paper in a garland pattern (connecting them later with a fine-tip Sharpie).
-
Let the fluid/wax dry completely.
-
Have the kids paint a vibrant watercolor wash right over the entire paper. The paint will “resist” the stamped shapes, leaving crisp white ornaments against a colorful background.
-
4. The Interactive Paint Chip Pull-Tab
Merging: Paint Chip Art (Kids/Artistic) + Pull-Tab Mechanism (Interactive)
-
The Concept: A minimalist modern tree design where the “lights” magically appear when you pull a tab.
-
How to Make It:
-
Cut several triangles of varying sizes from green ombre paint chips to form a tree. Glue them to the card front.
-
Using a thick needle, poke holes through the paint chip triangles where the “lights” should go.
-
Create a hidden channel behind the card front using foam tape.
-
Cut a strip of paper (the pull tab) and color sections of it brightly (yellow, red, blue).
-
Insert the tab into the channel so that when pulled, the colored sections align behind the holes in the paint chips, making the tree “light up.“
-
5. The Felt & Sequin embroidered Stocking
Merging: Felt Appliqué (Artistic/Kids) + Shaker Elements (Interactive)
-
The Concept: A cozy felt stocking sewn onto the card, with a tiny, clear pocket functioning as a shaker filled with micro-sequins.
-
How to Make It:
-
Cut a stocking shape out of festive felt.
-
Before sewing it to the card, cut a small square window in the middle of the felt stocking.
-
Create a tiny sequin pocket using acetate and foam tape behind the felt window.
-
Stitch the felt stocking onto the card using colorful embroidery floss (a great skill-builder for older kids), making sure to stitch around the shaker window to secure it.
-
Tips for Success
-
Keep Supplies Handy: A “craft bin” with glue sticks, scissors, cardstock, and washi tape is your best friend.
-
Add a Personal Touch: Regardless of the design, the most important part is the message inside. Include a handwritten note sharing a specific memory from the year.
-
Use Quality Cardstock: For a professional look, choose a heavyweight cardstock (around 80lb–100lb) so the paper doesn’t buckle under paint or glue.
-
Embrace Imperfection: If a line is crooked or a sparkle is out of place, remember the “Handprint Holly” rule—the recipient will value the effort and the story behind the card far more than machine-pressed perfection.
READ NOW: Cute Romantic Date Ideas: Spark Magic Beyond the Usual Dinner and Movie
Start Your DIY Journey Today
You don’t need a professional studio to make beautiful holiday cards. Use supplies like washi tape, old book pages, or felt designs. The fun of creating brings the holiday spirit to your home.
This season, skip buying cards from stores. Gather your materials, clear the kitchen table, and get ready to make cards that your friends and family will cherish for years.
Do you have a favorite holiday craft from childhood that you’ll recreate with your family this year?